Set Up Tencent COS as Backup Storage for Zimly: A Step-by-Step Guide
Tencent COS is an S3-compatible object storage service provided by Tencent Cloud. Tencent Cloud is based in Shenzhen, China, with data centers operated worldwide.
It is a technical product generally aimed at tech-savvy users.
Prerequisites
Before you begin, make sure to:
- Sign up for Tencent Cloud
- Provide your credit card details for payment.
- Have a basic understanding of web hosting services and web security concepts.
In this setup, you will create the following resources using COS (Cloud Object Storage) and CAM (Cloud Access Management):
- CAM: In addition to the root account, create a sub-account:
- Generate a SecretId and Secret for the sub-account.
- COS: Create a bucket and assign ACLs to the sub-account with
ReadandWritepermissions.
Create Sub-Account and Secret
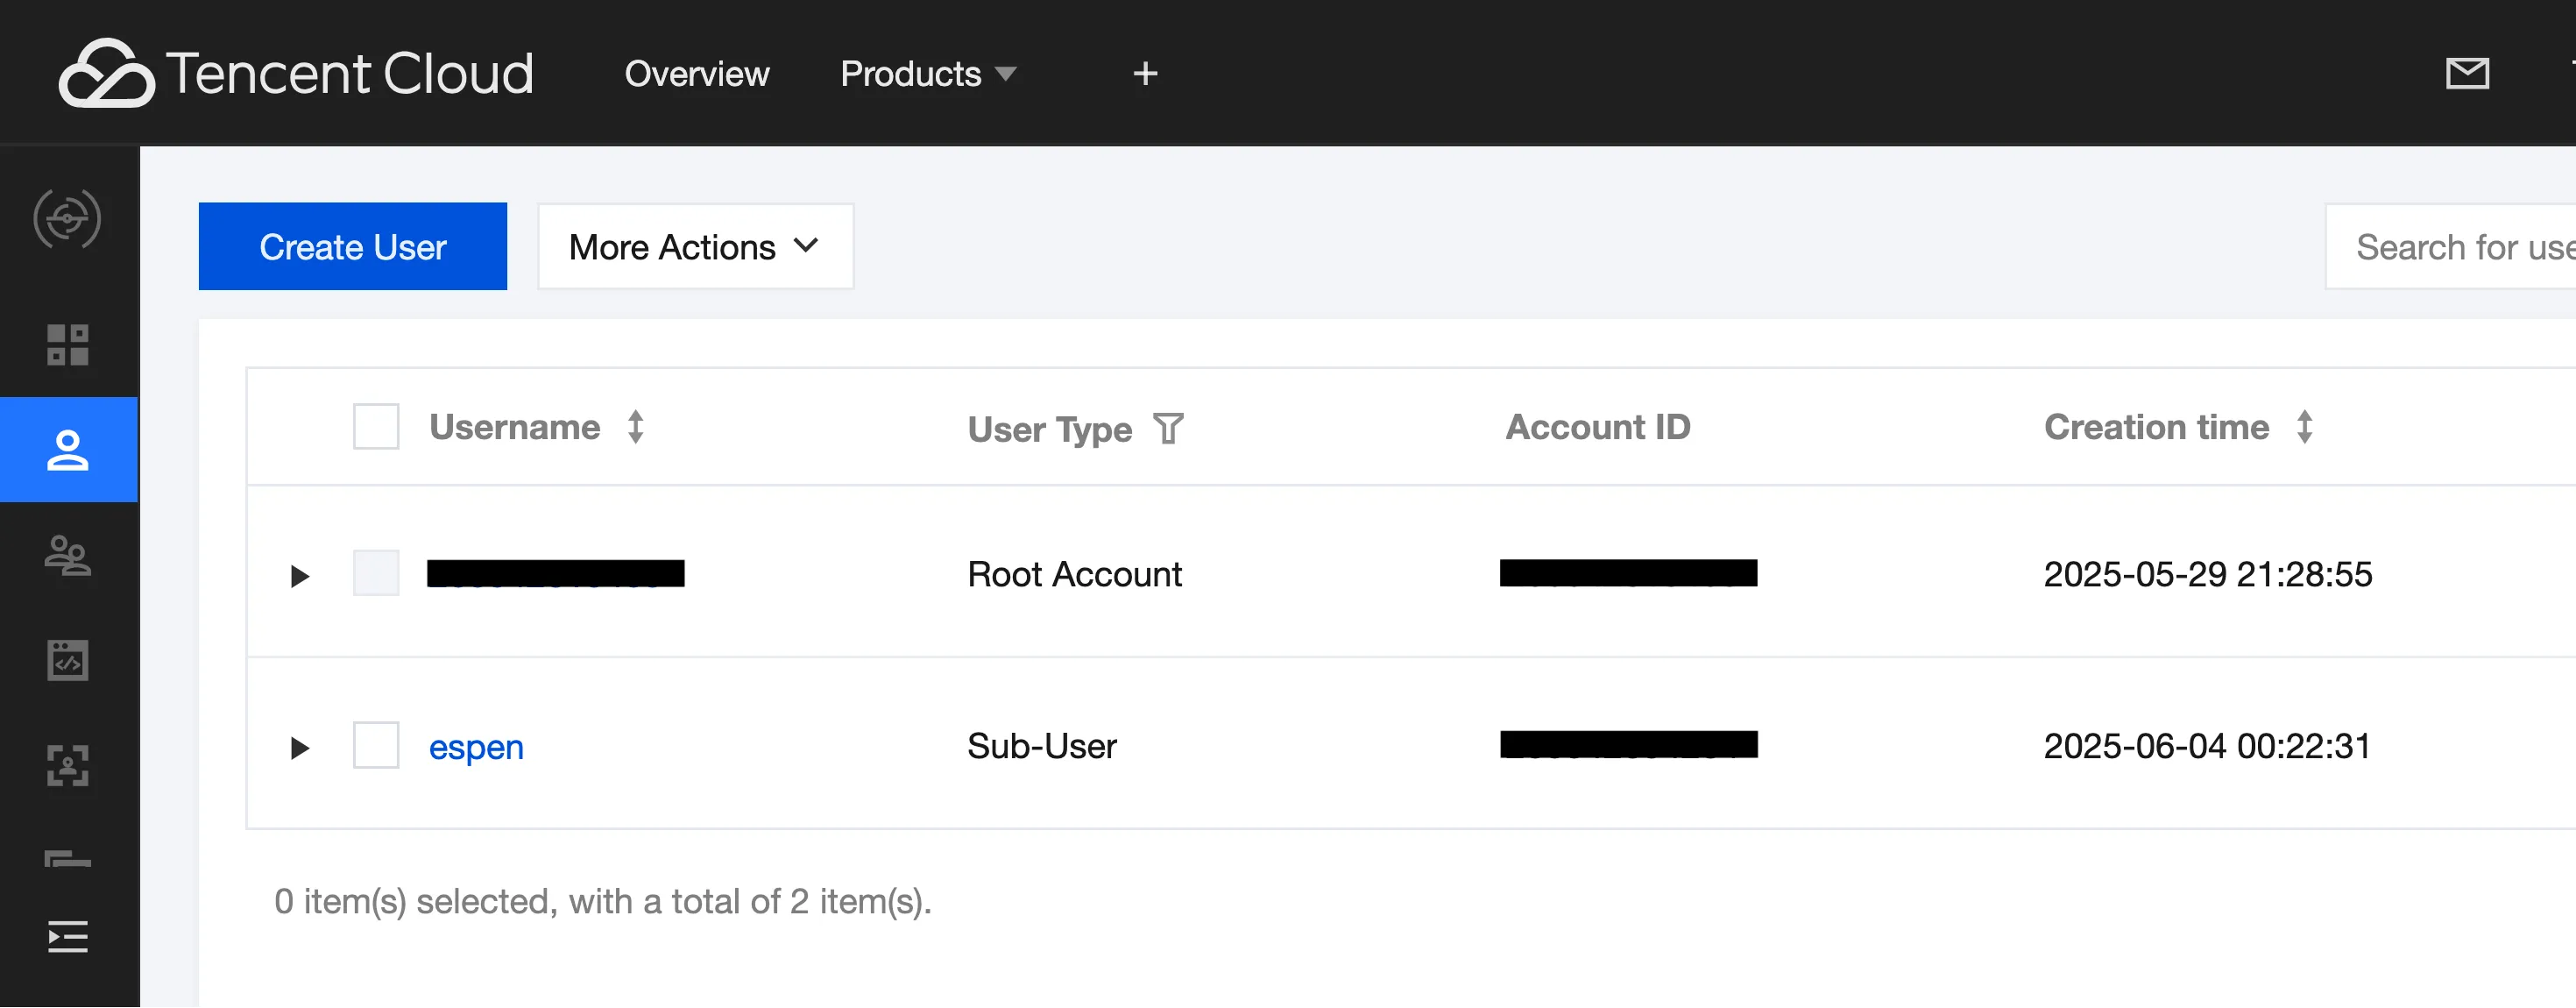
In the Tencent Console, search for and open Cloud Access Management (CAM). Go to the User List and create a new user alongside the root user:
Then, create a Secret ID and Secret for programmatic access with the new sub-user:
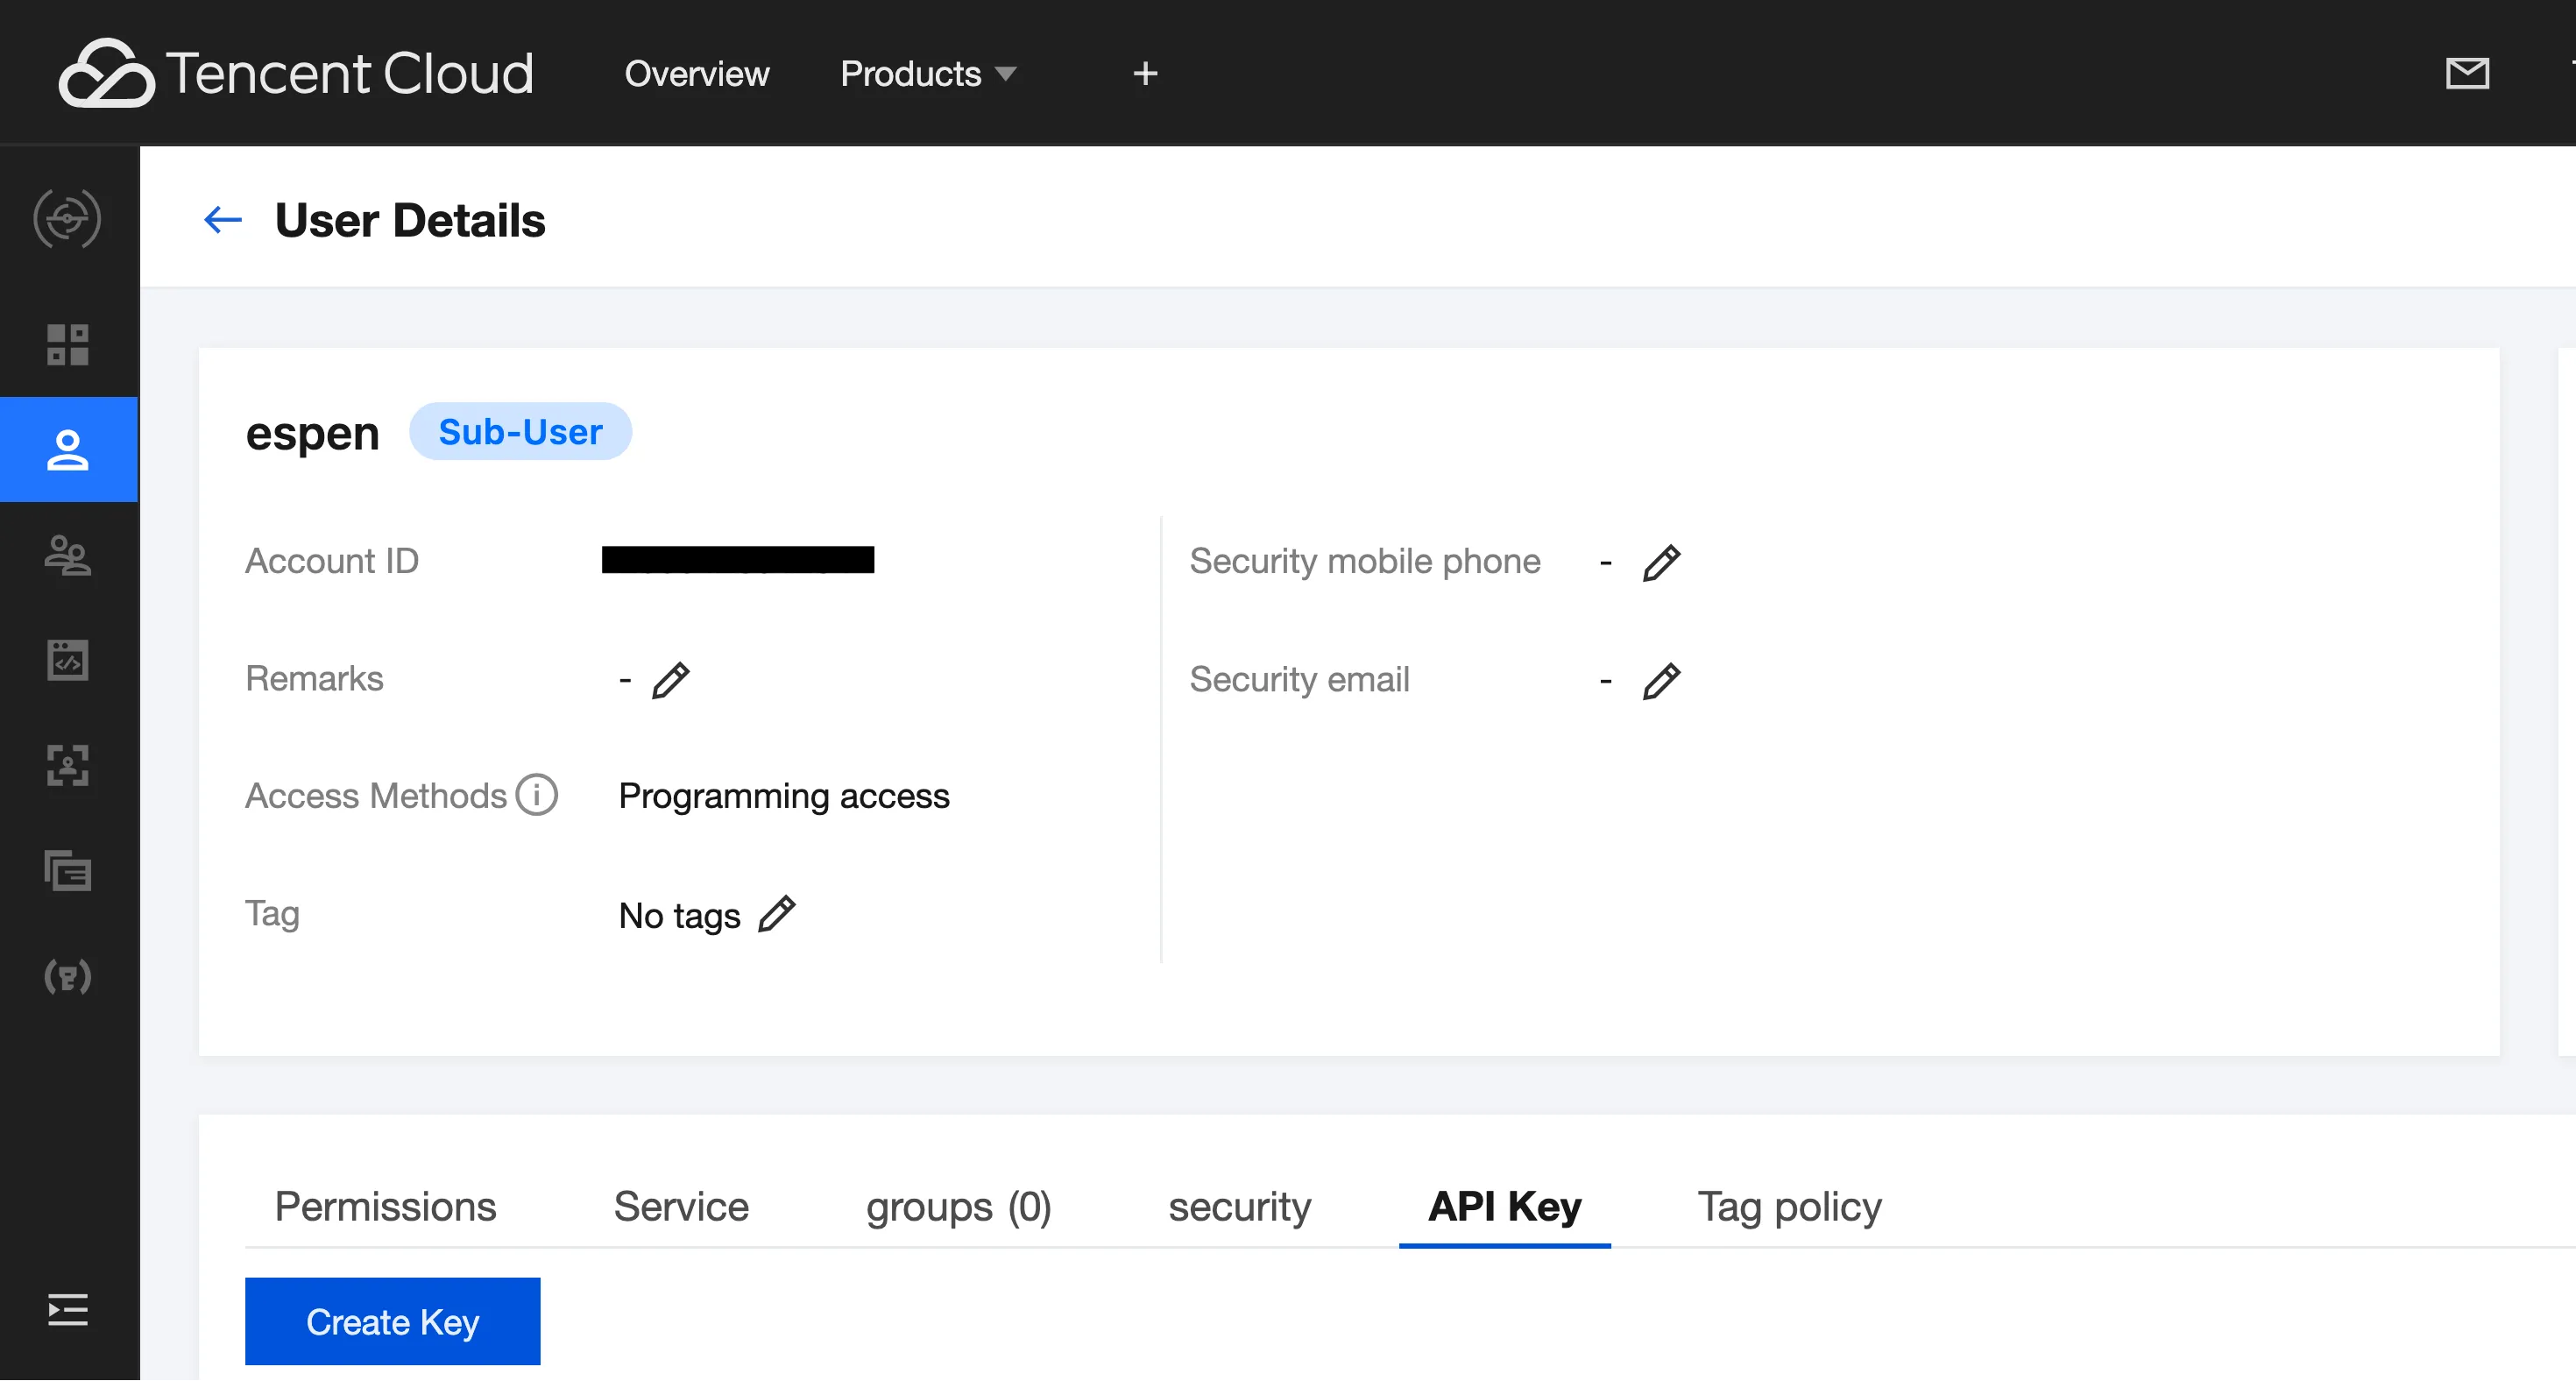
Make sure to copy the Secret ID and Secret and store them securely in your password manager.
COS: Create a Bucket
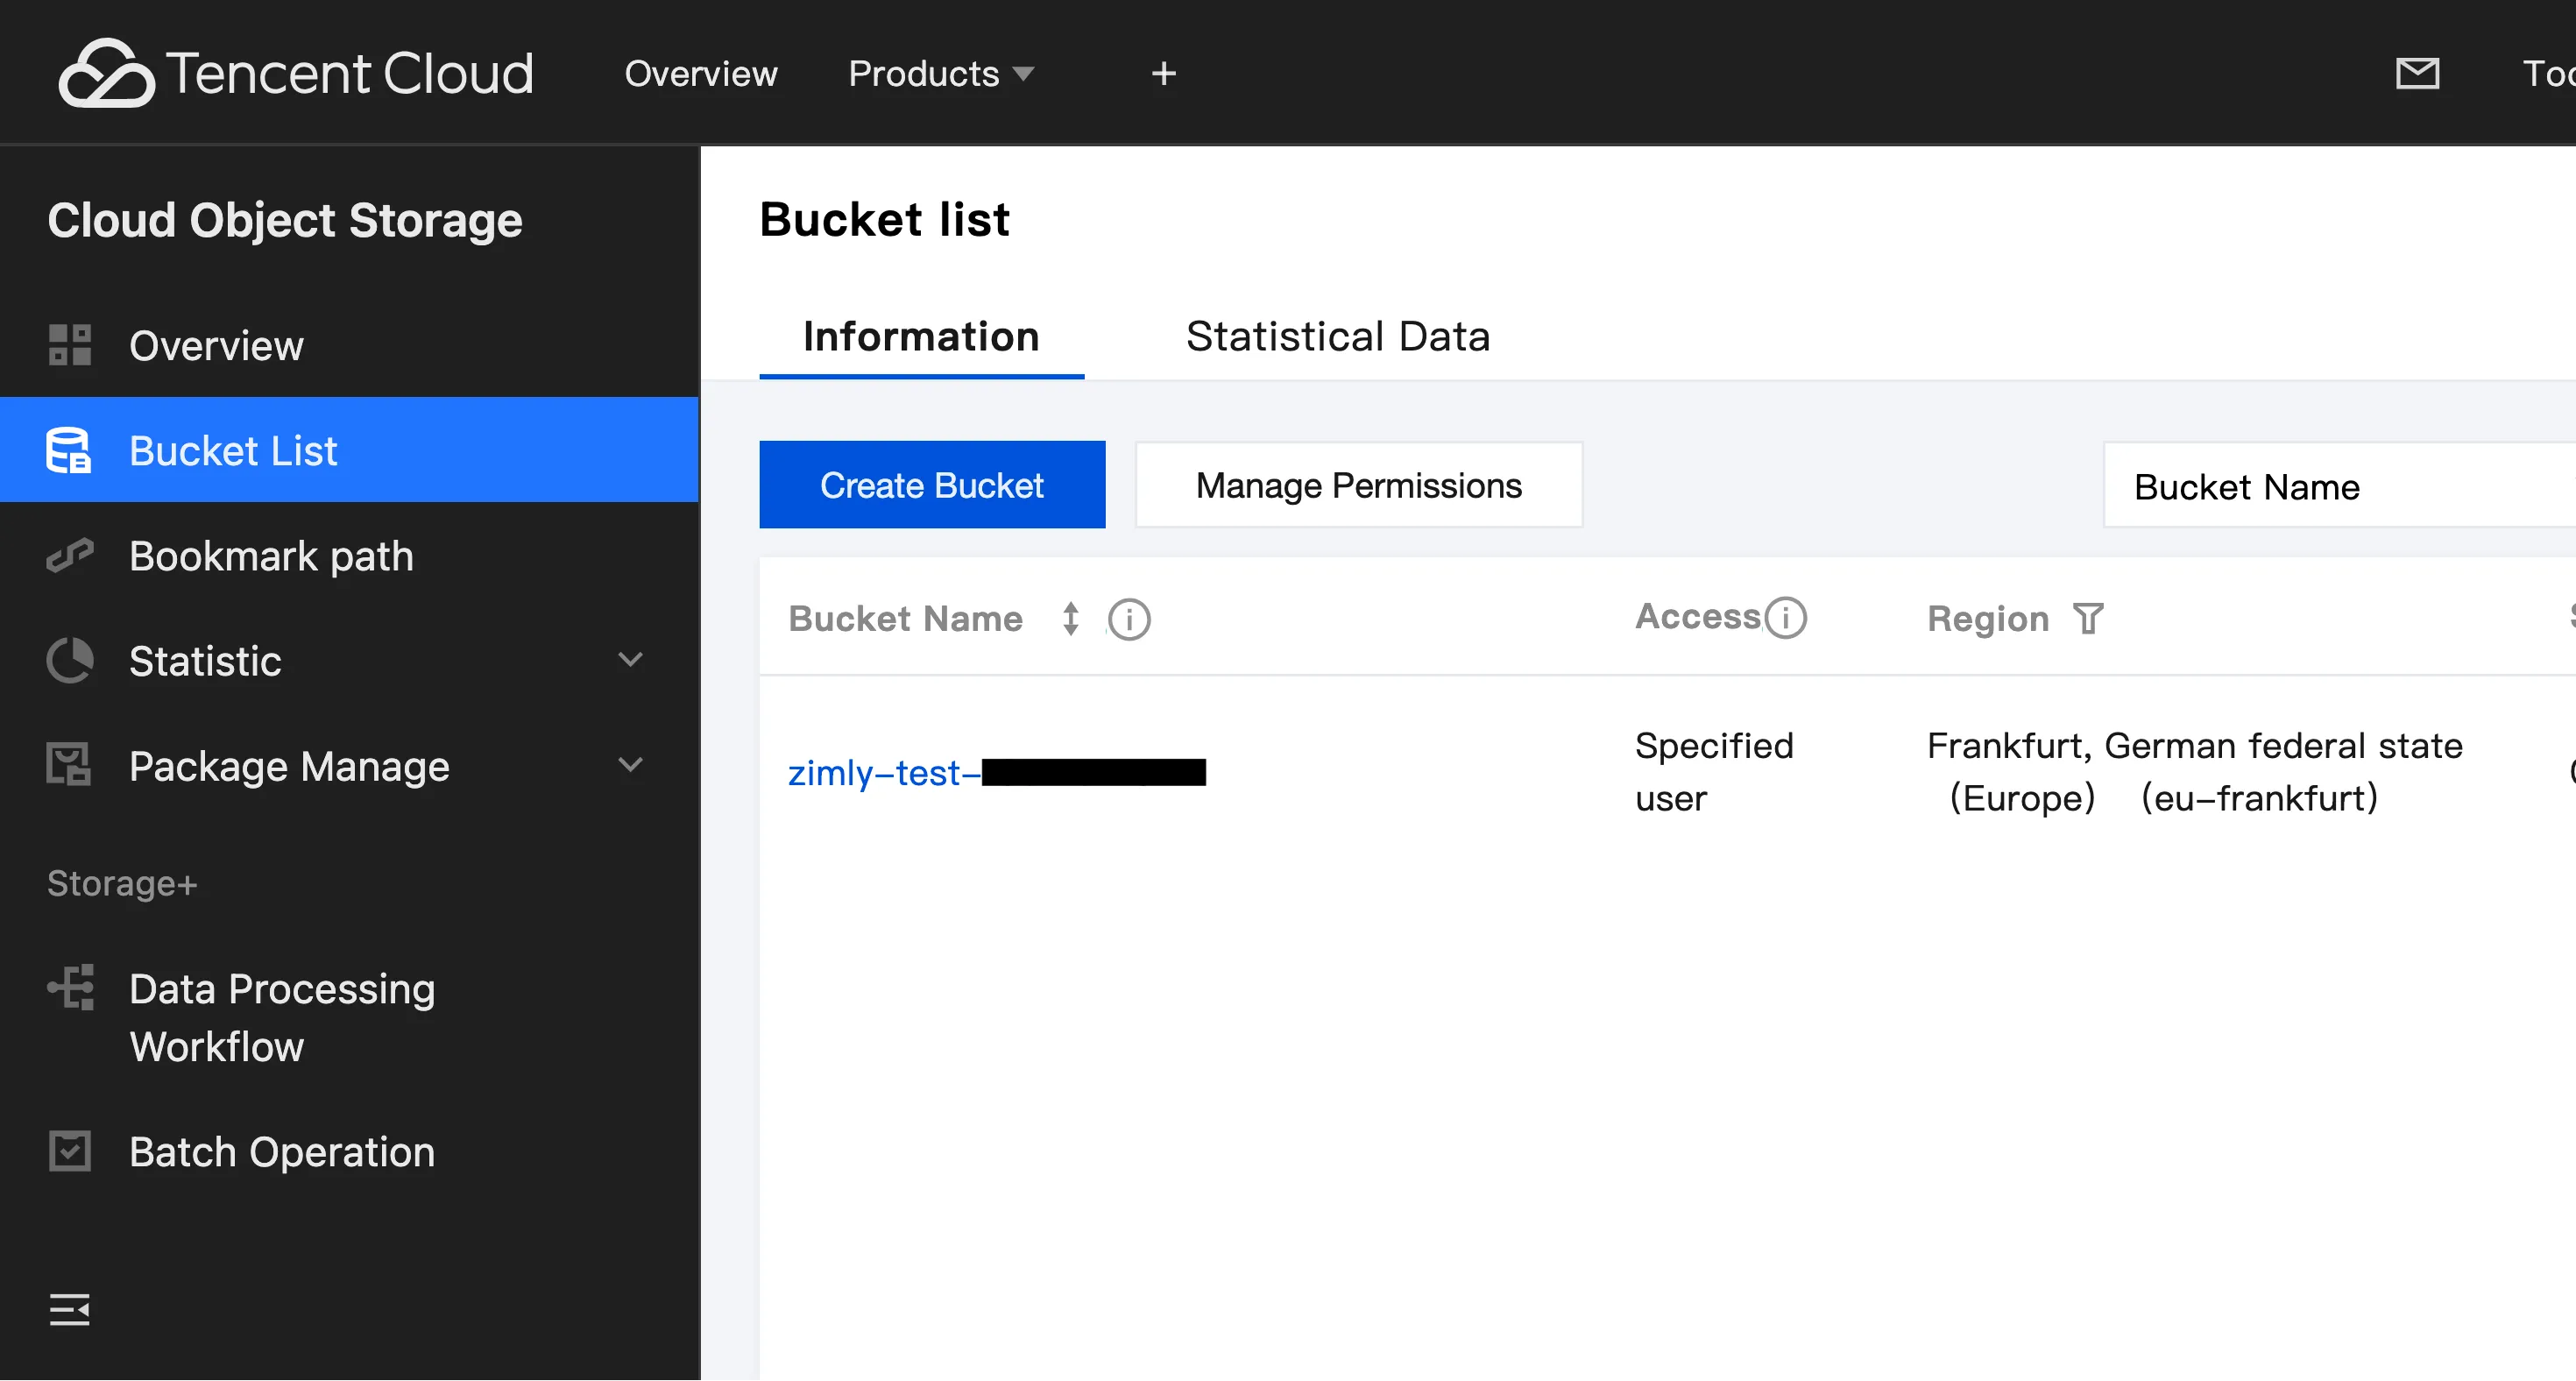
Open Cloud Object Storage and create your bucket:
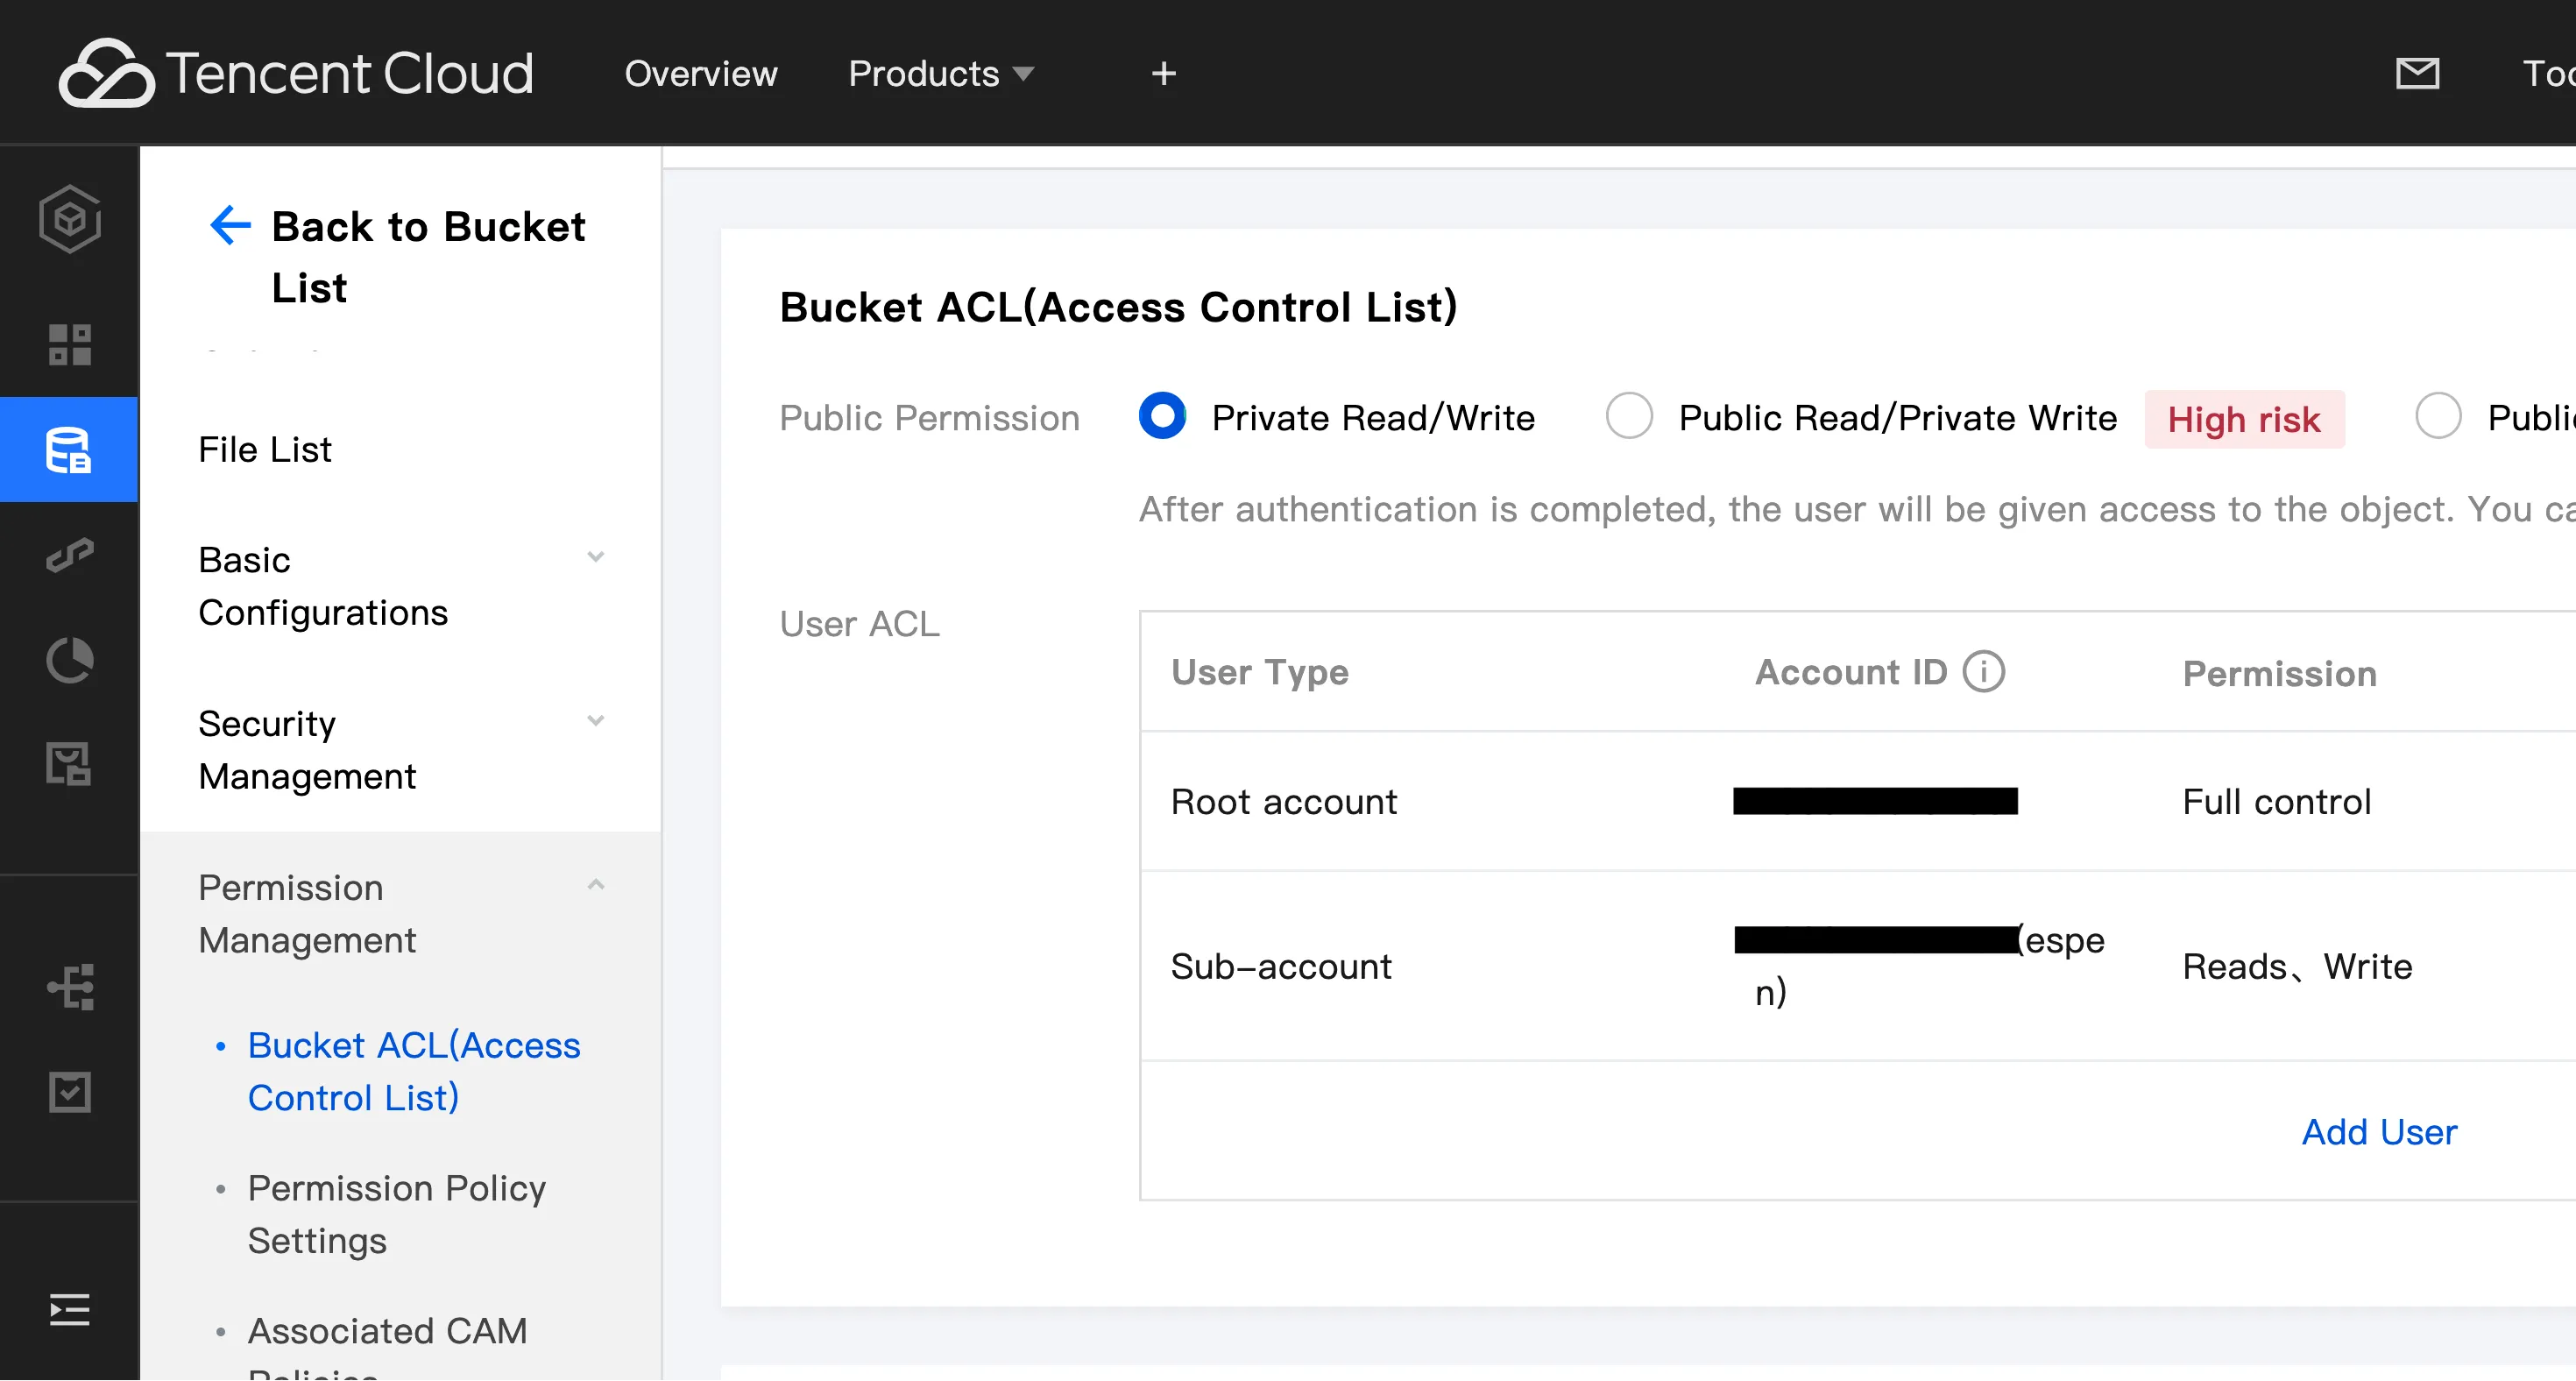
ACL: Grant Access Permissions to the Bucket
Next, attach an ACL to the newly created bucket for the sub-user:
Finalizing Your Backup Setup in Zimly
Now, let’s put everything together and finalize the backup setup in Zimly. We’ll create a new configuration to back up the Pictures folder.
Name: Zimly Tencent Pictures
URL: https://cos.<REGION>.myqcloud.com
Region: <REGION>
Key: <TENCENT_SECRET_ID>
Secret: <TENCENT_SECRET>
Bucket: zimly-test-<identifier>
Virtual Hosted Style: enabled

Folder: Pictures
Replace <REGION>, <TENCENT_SECRET_ID>, <TENCENT_SECRET>, and <identifier> with the appropriate values from your setup and make sure you enable Virtual Hosted Style.